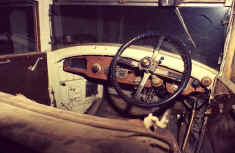
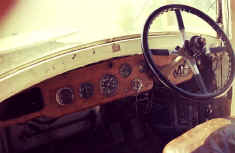
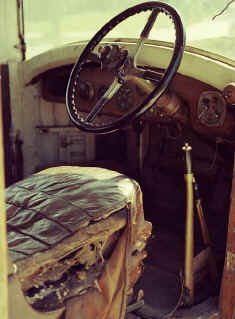
 |
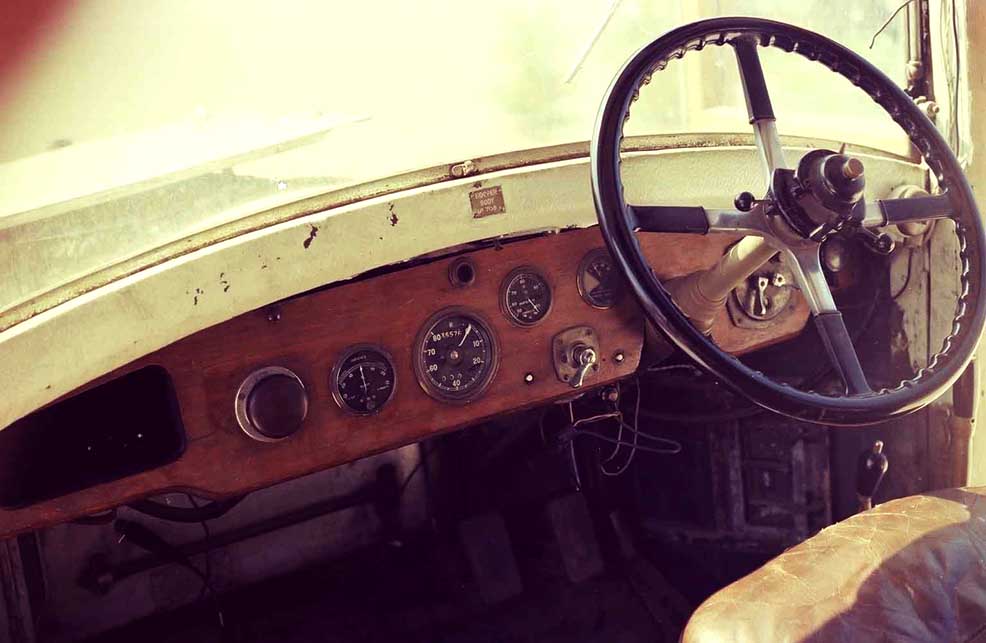
| This
picture was taken |
| in
1977 and shows the |
| terrible
shape of the |
| interior.
Someone had |
| tried
to make things a |
| bit
more tidy by using |
| a
splash of white paint |
| here
and there. All that |
| was
stripped, but was |
| all
covered with wood |
| or
leather as well. |
|
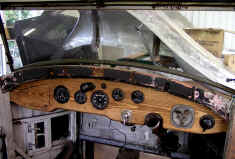 |
| After
making a test |
| instrument
board from |
| foam,
I made this board |
| from
pine. These type |
| of
trial efforts save |
| the
expensive final |
| wood
from being |
| wasted
due to mistakes |
| or
changes. I was also |
| able
to try the cut for |
| the
glove box door |
| used
that makes the |
| grain
match. |
|
 |
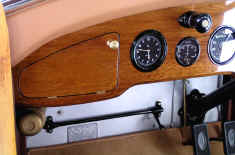
| The
instrument board |
| had
an ash tray put |
| where
the clock once |
| fit.
That and other cuts |
| required
a new board. |
|
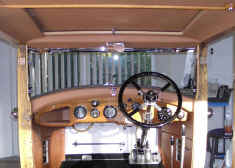 |
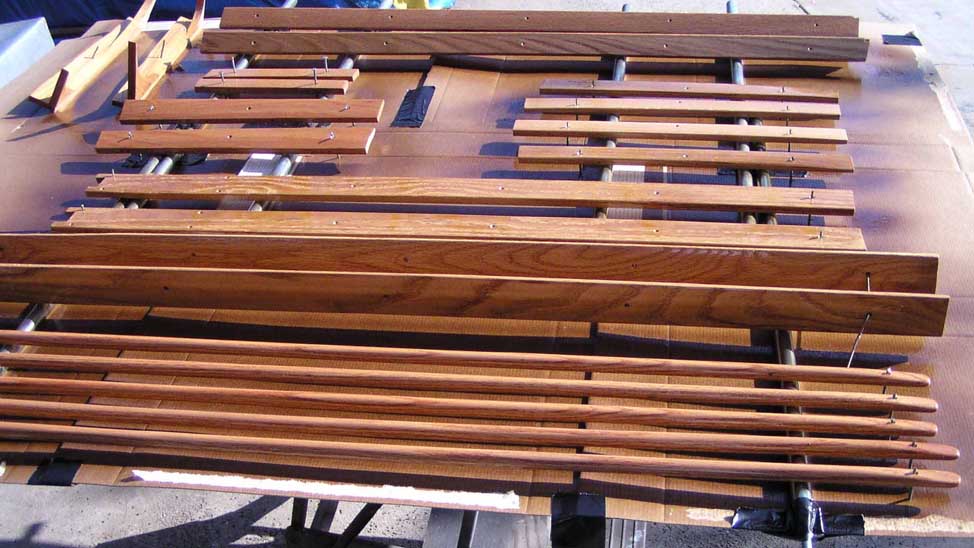
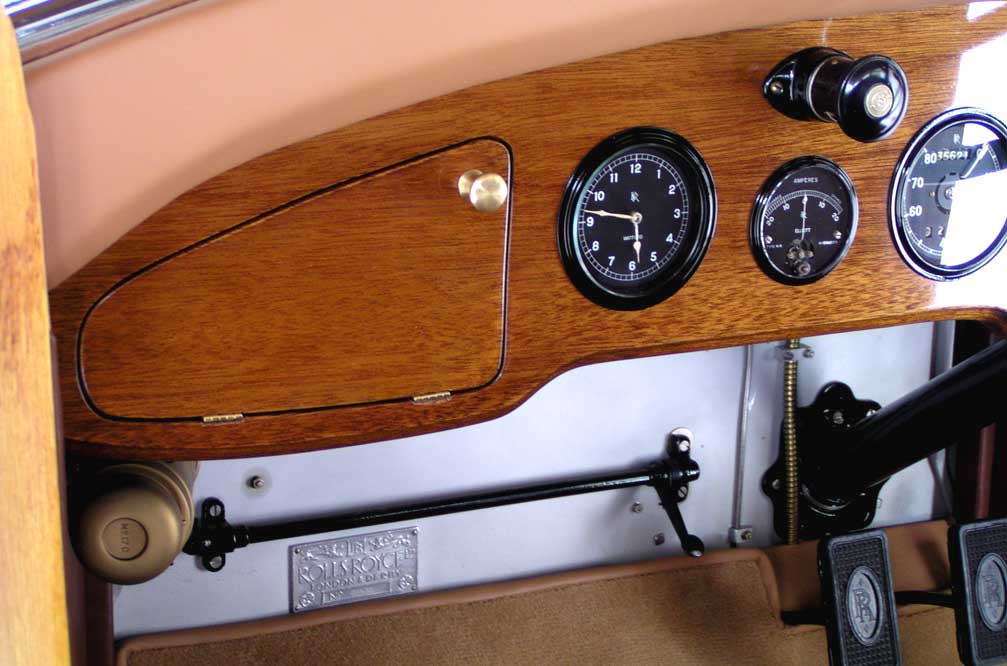
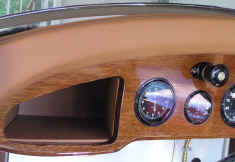
| The
final mahogany |
| instrument
board did |
| have
changes to the |
| layout.
Note the light |
| was
centered over |
| three
instruments in this |
| finished
board. The |
| glove
box door is |
| shown
installed in |
| later
pictures. |
|
 |
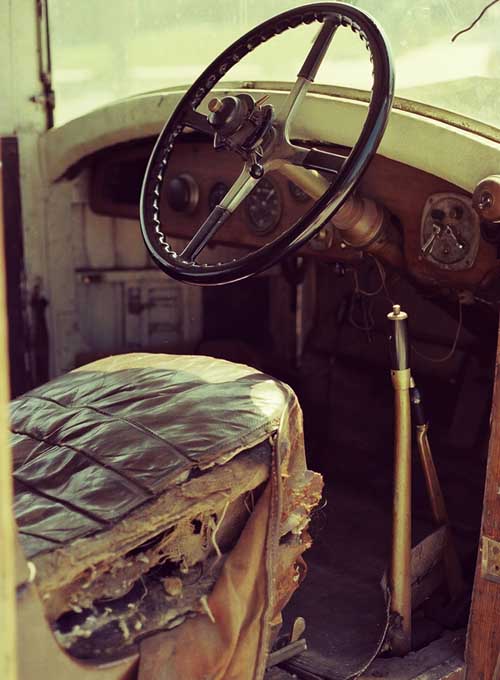
| Only
front seats were in |
| the
car and were bad at |
| that.
Everything had |
| a
very bad smell. |
|
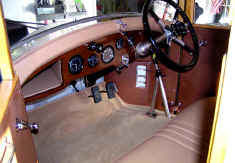 |
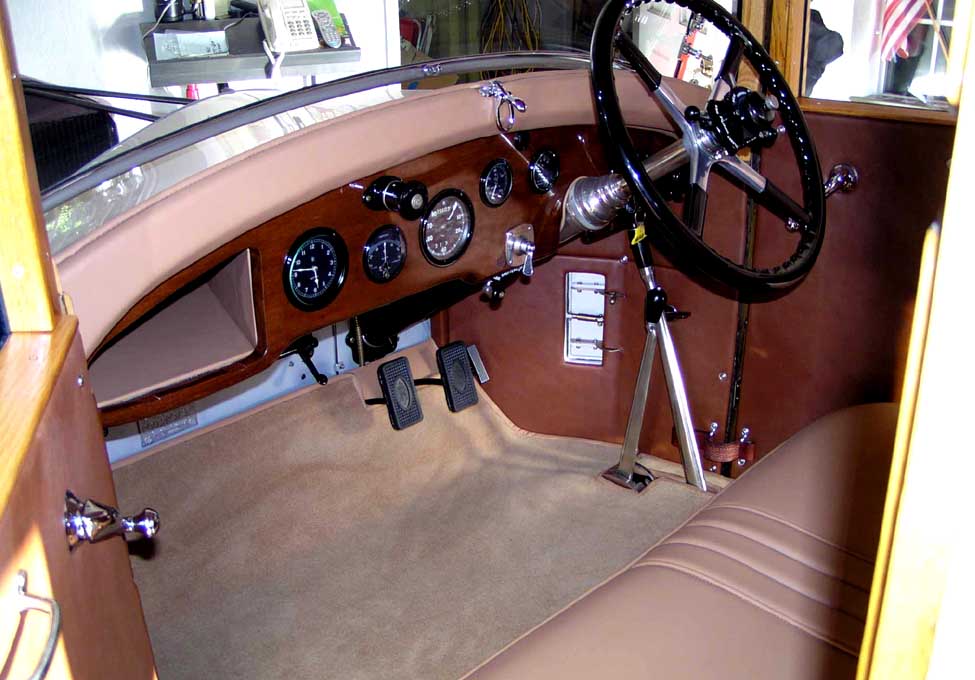
Aaah! THE SWEET
SMELL
OF NEW LEATHER UPON
OPENING THE DOOR!
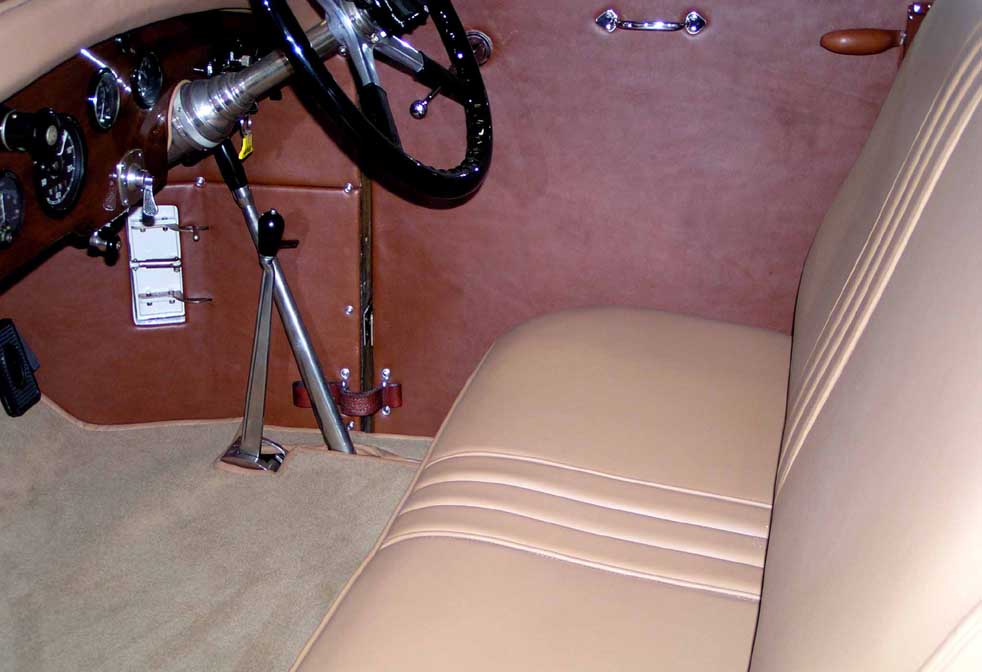
| A
view showing the |
| business
end of the |
| drivers
compartment. |
|
 |
| The
leather about to be |
| stretched
on the seat |
| frame. |
|
 |
| The
seats being trial fit |
| for
height and distance. |
| Note
the front seat base |
| gives
good height and |
| has
two drawers for |
| handy
stowage of tools |
| normal
use items not |
| fitting
in the glove box. |
| The
hand crank is kept |
| in
one of these drawers. |
|
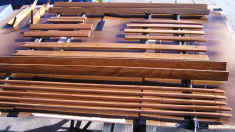 |
| Interior
wood trim |
| being
varnished. |
|
 |
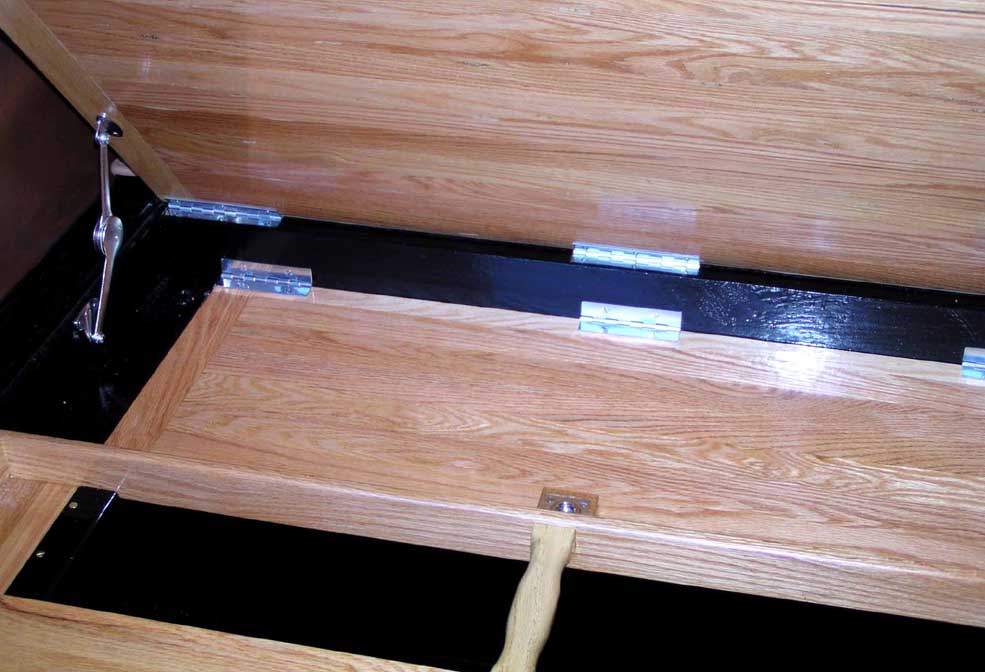
| A
shot of the rear |
| compartments. |
| Another
picture of the |
| large
items like the jack |
| is
in the tools section. |
|
 |
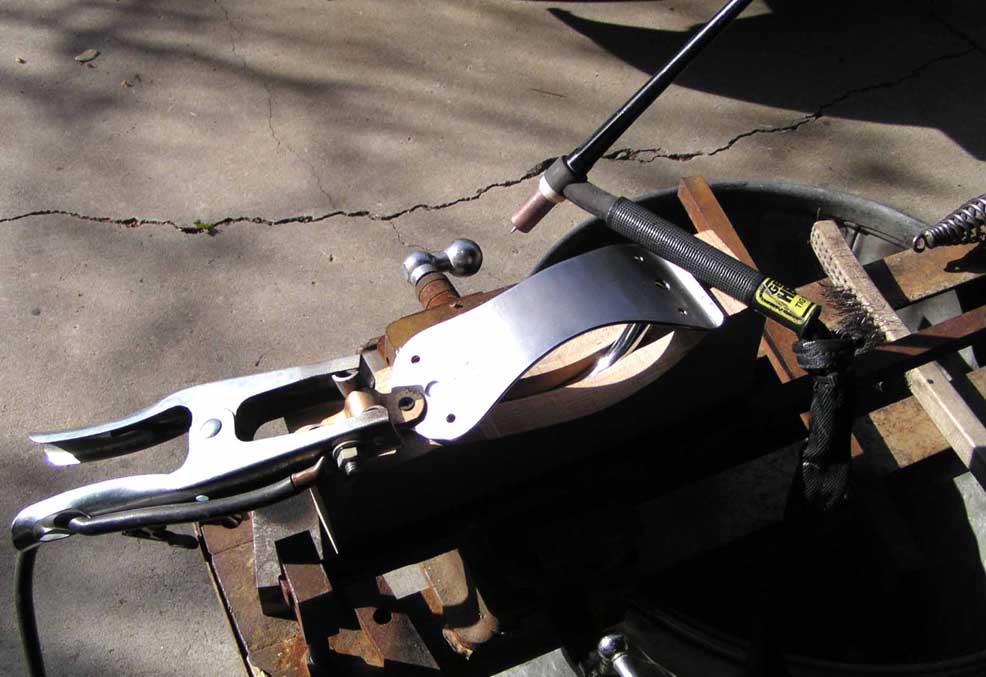
| Rear
seat grab bars |
| being
made. This is |
| showing
the TIG |
| welder
about to attach |
| the
handle to the base. |
|
| The
TIG welder is most |
| useful
for precision |
| welds,
particularly on |
| aluminum.
These |
| parts
are steel and were |
| polished
for plating. |
|
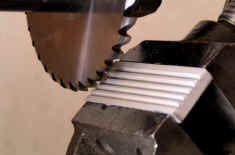 |
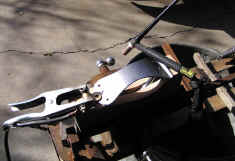
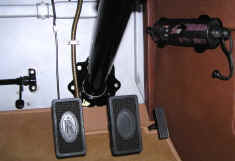
| The
steel foot throttle |
| was
worn and had to |
| be
welded to have a |
| flat
pad. Then the |
| groves
were machined |
| back
in with this |
| carbide
blade used in |
| my
horizontal mill. |
|
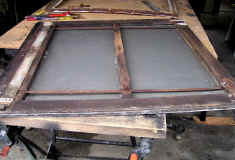 |
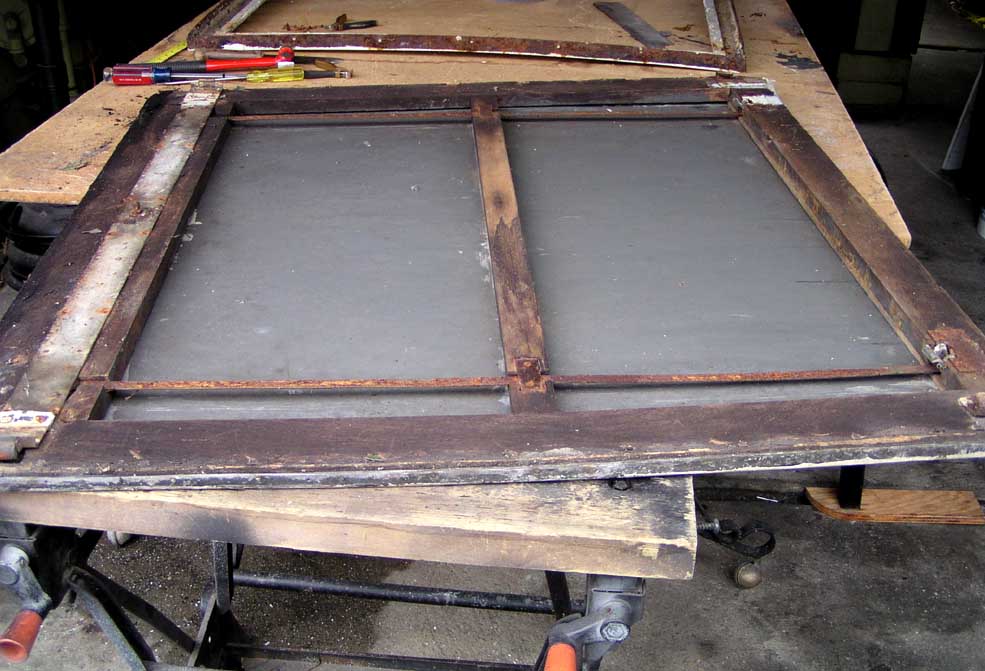
| The
sliding sunroof |
| being
measured and |
| disassembled.
Only |
| the
aluminum skin and |
| hardware
was reused. |
| All
of the wood was |
| replaced
and had |
| compound
curves. |
|
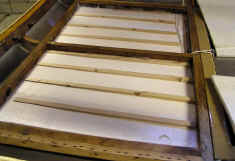 |
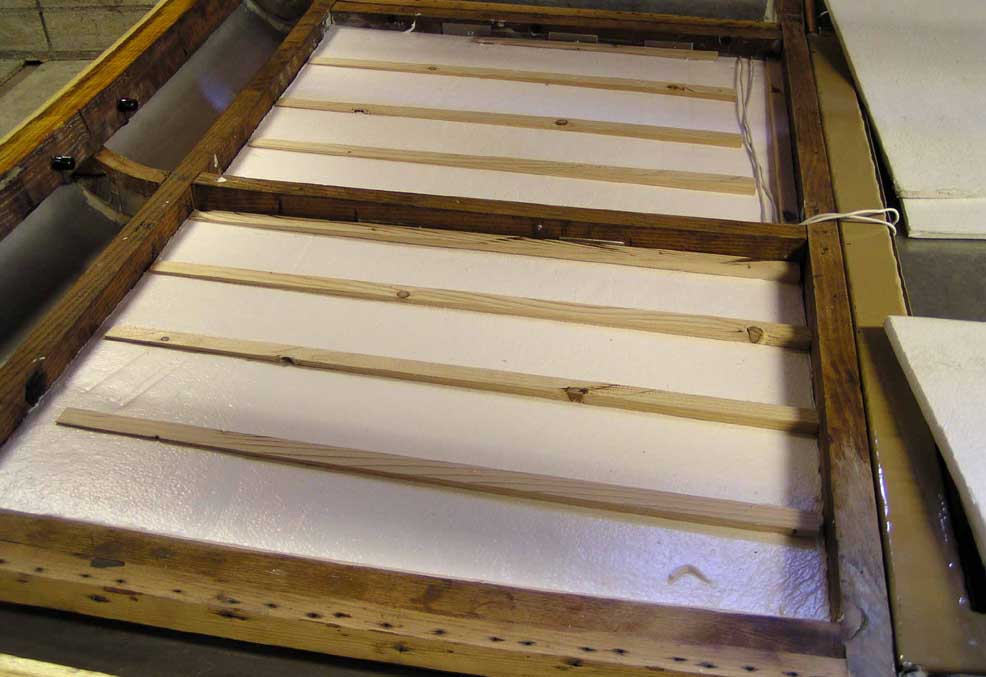
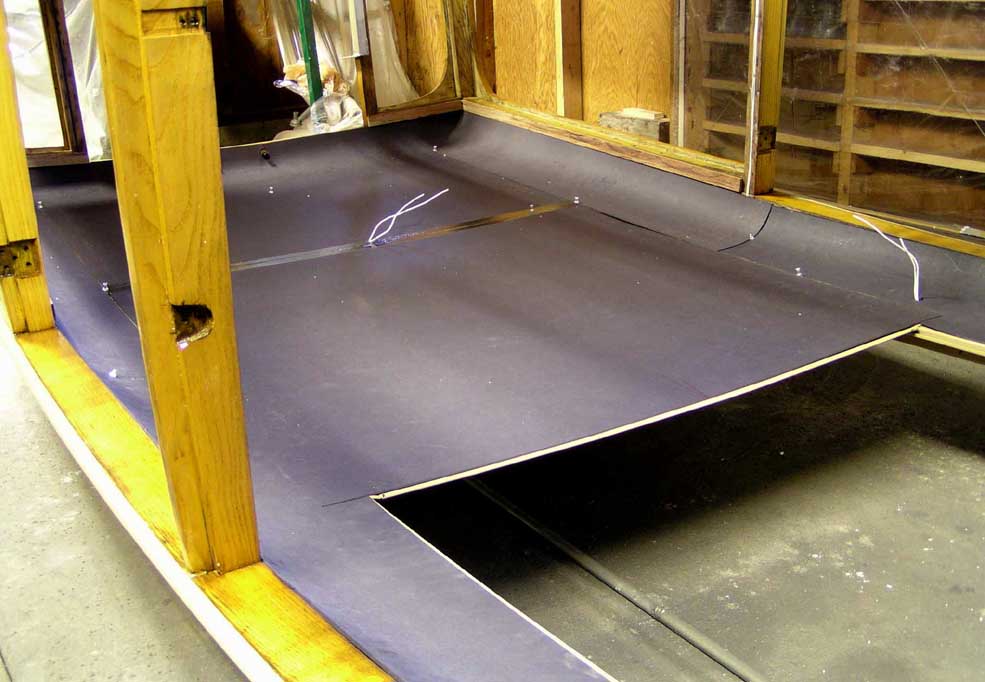
| With
the coach upside |
| down,
it was time to do |
| the
insulation and |
| supports
for the |
| headliner
upholstery |
| board. |
|
 |
| The
coach upside down |
| on
the rotary stand for |
| fit
of the headliner |
| upholstery
board. This |
| view
is from the sunroof |
| opening
towards the |
| rear.
The coach had |
| been
wired for the dome |
| light
and fully insulated. |
| (see
next page). |
|
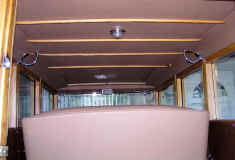 |
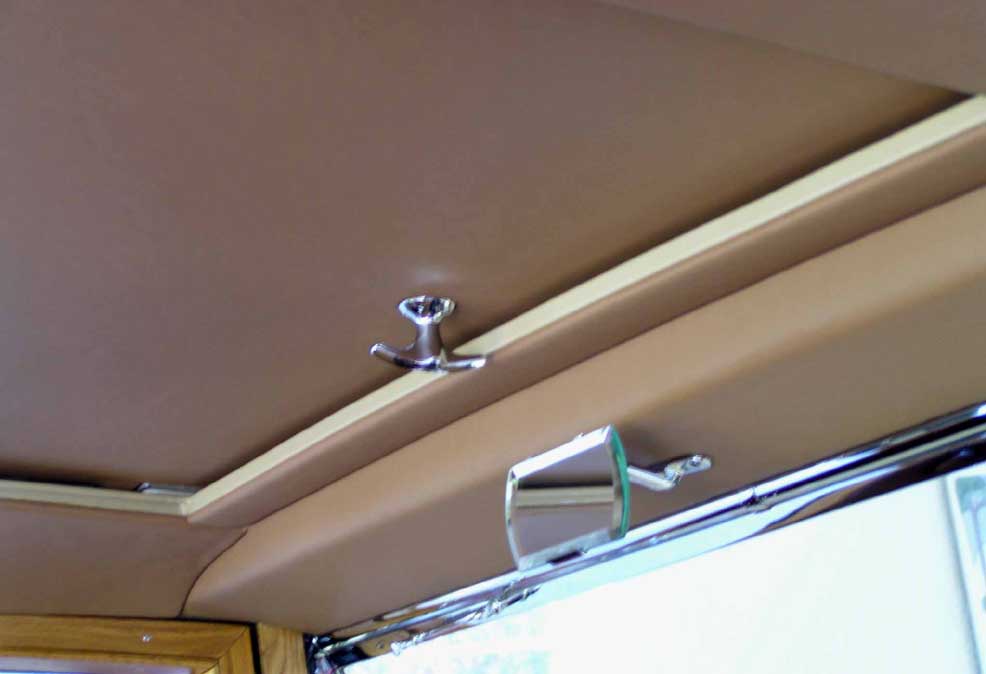
| Showing
the headliner |
| complete
and the sun |
| roof
in. |
|
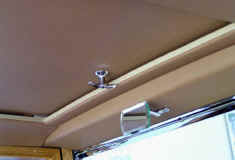 |
| Showing
the sunroof, |
| rear
view mirror, and |
| the
top of the windscreen. |
|
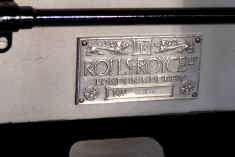 |
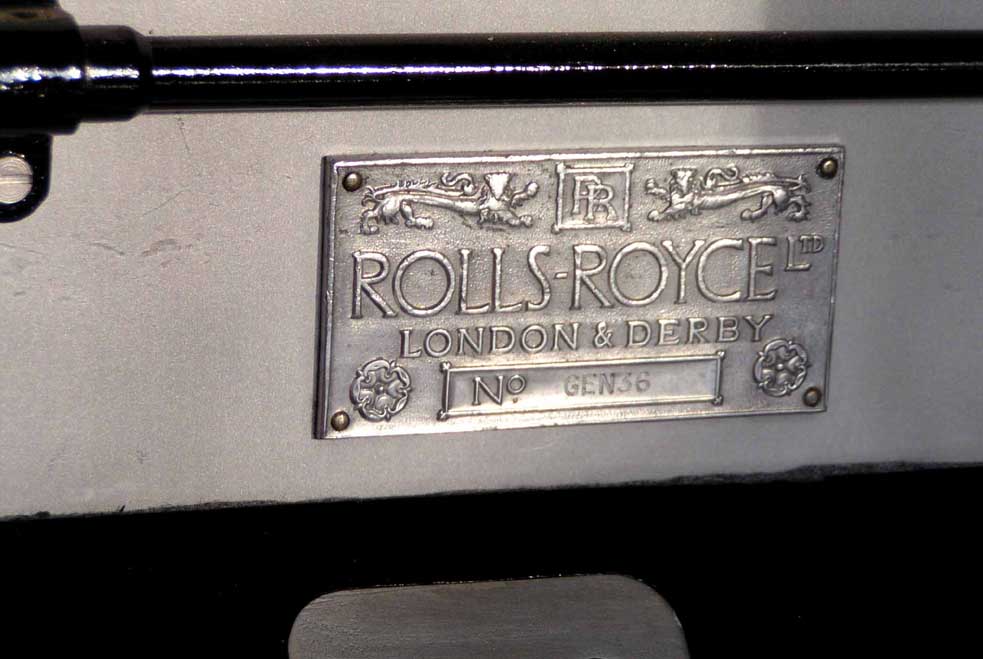
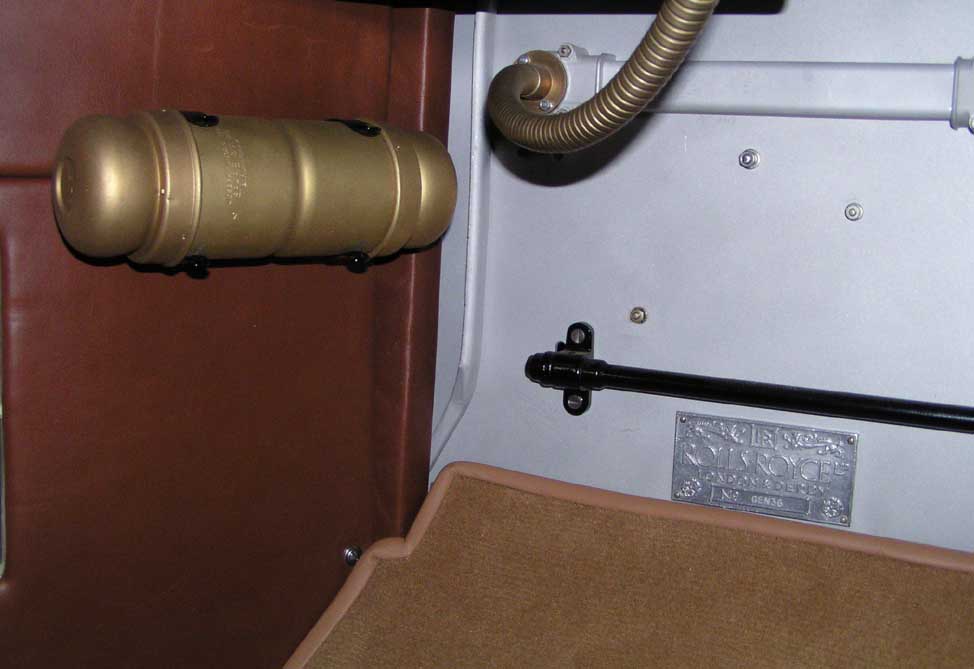
| Located
on the front |
| passenger
side just |
| above
the carpet is the |
| Chassis
ID Plate that |
| was
installed by the RR |
| factory
in 1929. It is due |
| in
part to this ID that |
| so
much history on RR |
| and
Bentley cars has |
| been
documented. |
|
| GEN
36 has orig. engine, |
| transmission,
and other |
| major
parts documented |
| on
the build sheets done |
| at
the time it was built. |
|
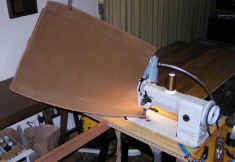 |
| While
seat upholstery |
| is
beyond my capability, |
| I
decided to try carpet |
| binding.
I acquired an |
| industrial
walking foot |
| sewing
machine. The |
| supplier
of the leather |
| did
strips to use on the |
| carpet
edging. Here, |
| the
machine is set to do |
| the
final stitch right |
| next
to the leather so |
| as
it will not show. |
|
 |
|
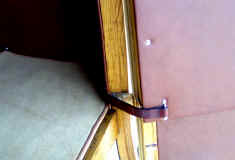 |
| The
industrial sewing |
| machine
was also used |
| to
stitch the heavy door |
| stop
straps. |
|
 |
|
 |
| I
made these straps so |
| that
some of the strap |
| slides
back as the door |
| is
closed. That way, |
| the
loop is smaller and |
| not
in the way. |
|
 |
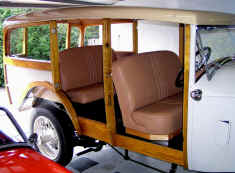
| Nearside
door, and |
| front
passenger area. |
|
| Note
the position of |
| the
chassis ID tag from |
| the
factory just under |
| the
manual starter foot |
| pedal. |
|
 |
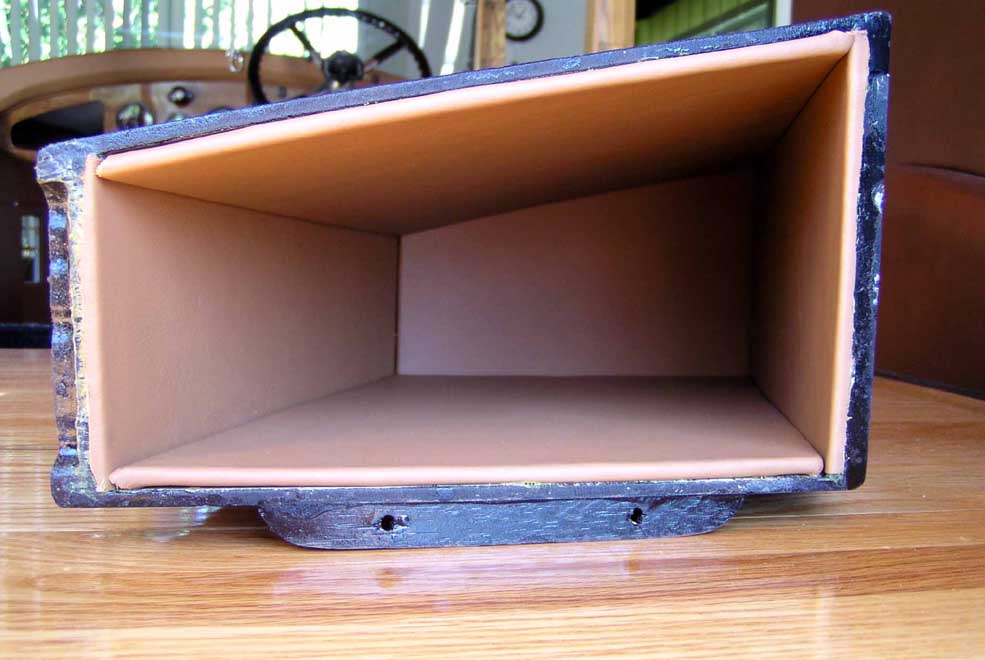
| The
glove box under |
| construction. |
|
 |
| An
accessory common |
| to
these cars is the |
| trouble
inspection |
| lamp.
It has a crank to |
| roll
up the cord after |
| use.
The cord has a |
| plug
to fit the plug-in |
| on
the switchbox on |
| the
instrument board. |
|
 |
|
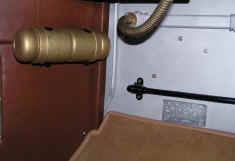 |
| The
Lucas spare bulb |
| holder
is a handy |
| accessory.
It is solid |
| brass
with bulbs of the |
| assorted
sizes in each |
| end. |
|
 |
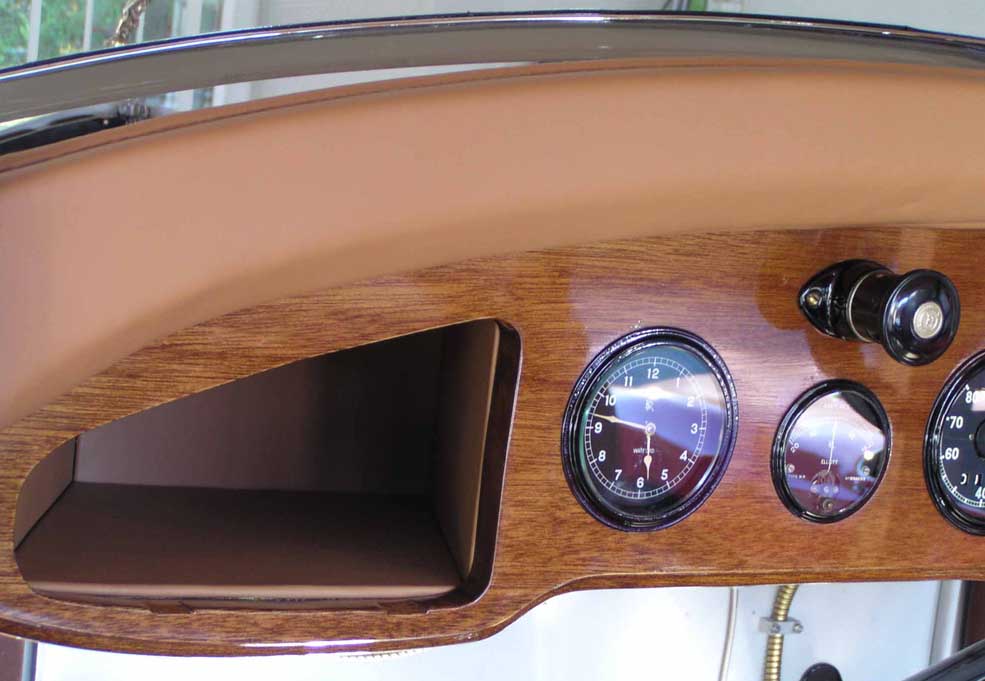
| The
glove box door |
| installed.
While |
| mahogany
does not |
| have
intensive grain, |
| the
match of the door |
| to
the board is seen on |
| close
inspection. |
|
 |
|
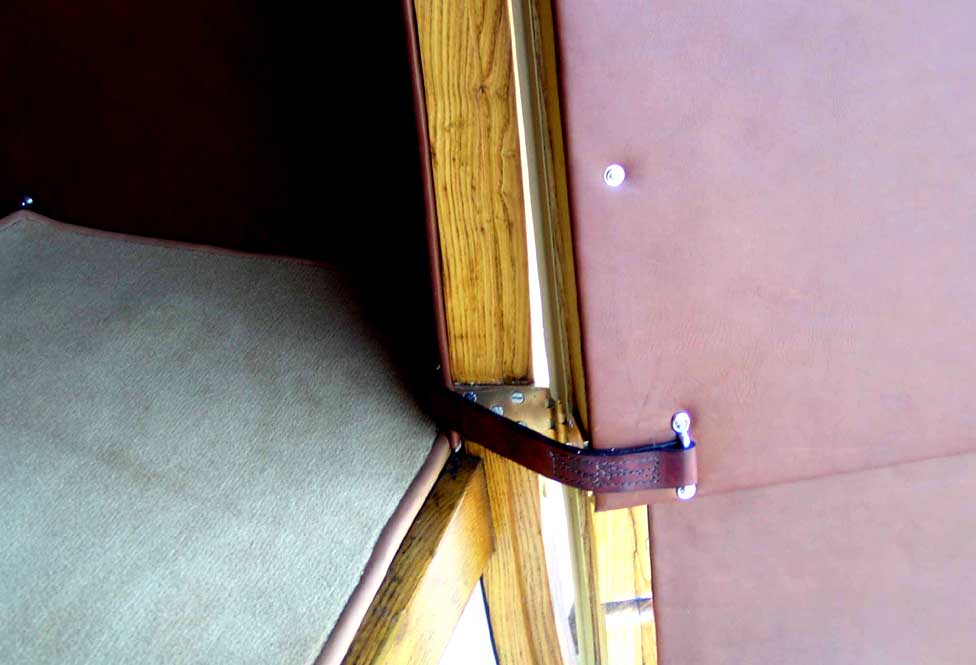
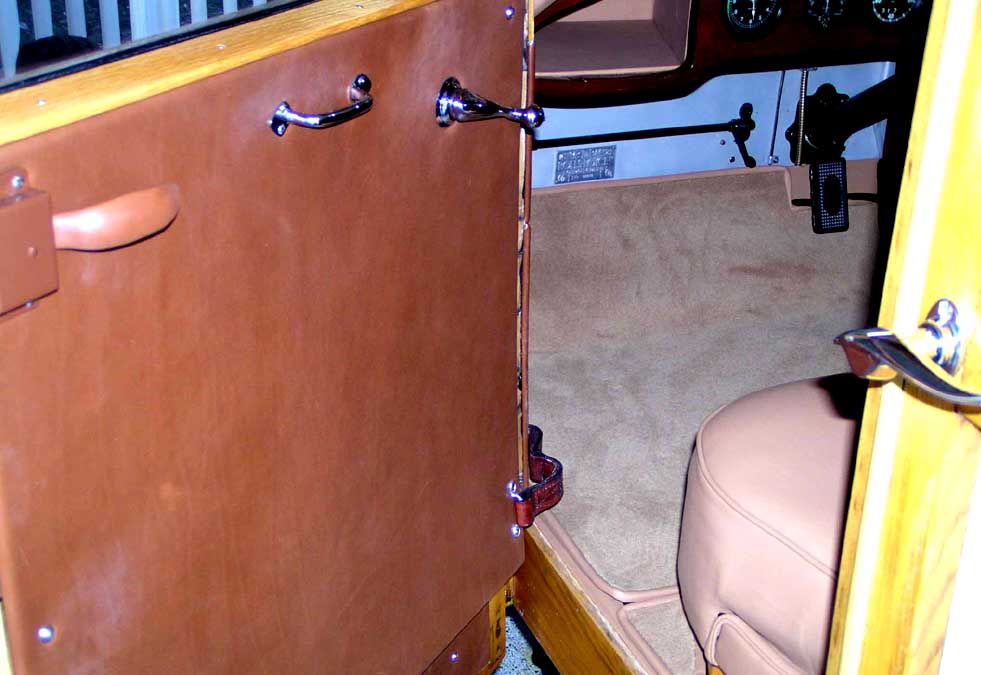
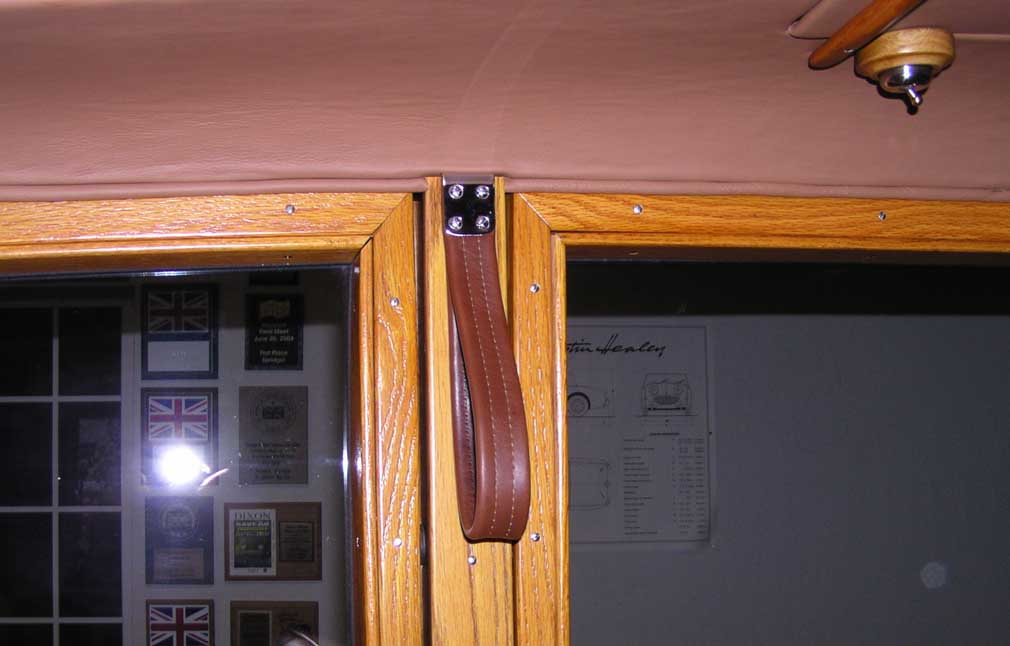
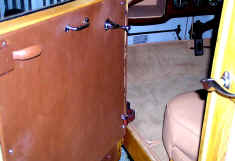
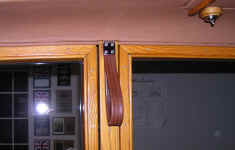
The door post from the |
| interior
with the hand |
| strap
shown. |
|
The rear door is a |
| "suicide"
door that |
| must
be locked when |
| the
car is being driven. |
|
As these doors open |
| from
the front, violent |
| damage
would result |
| from
wind assisted |
| opening
when underway. |
|
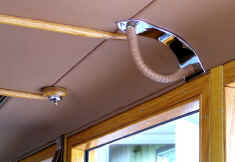 |
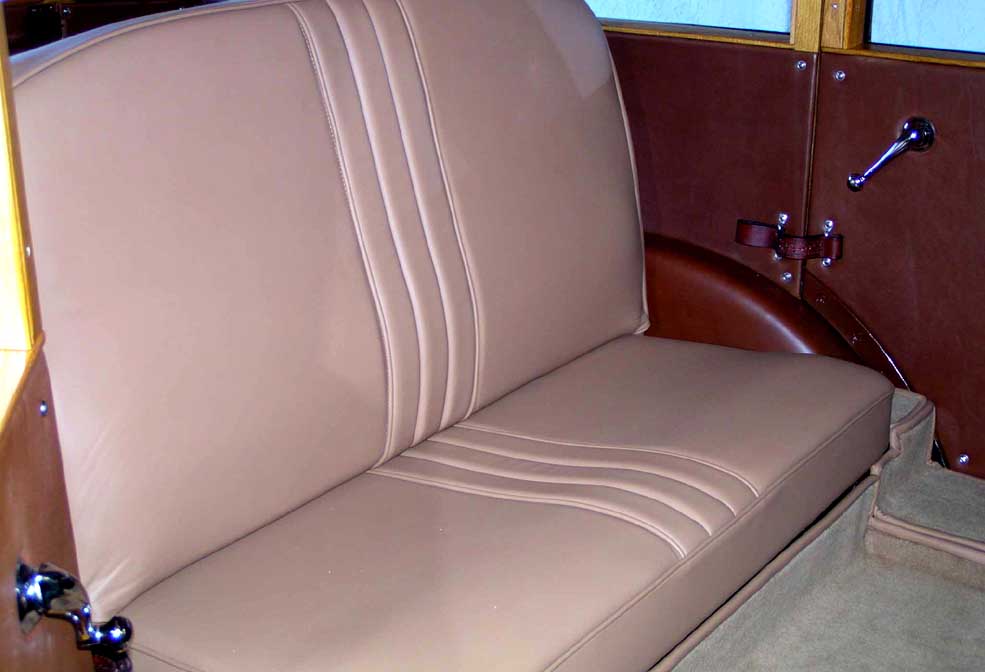
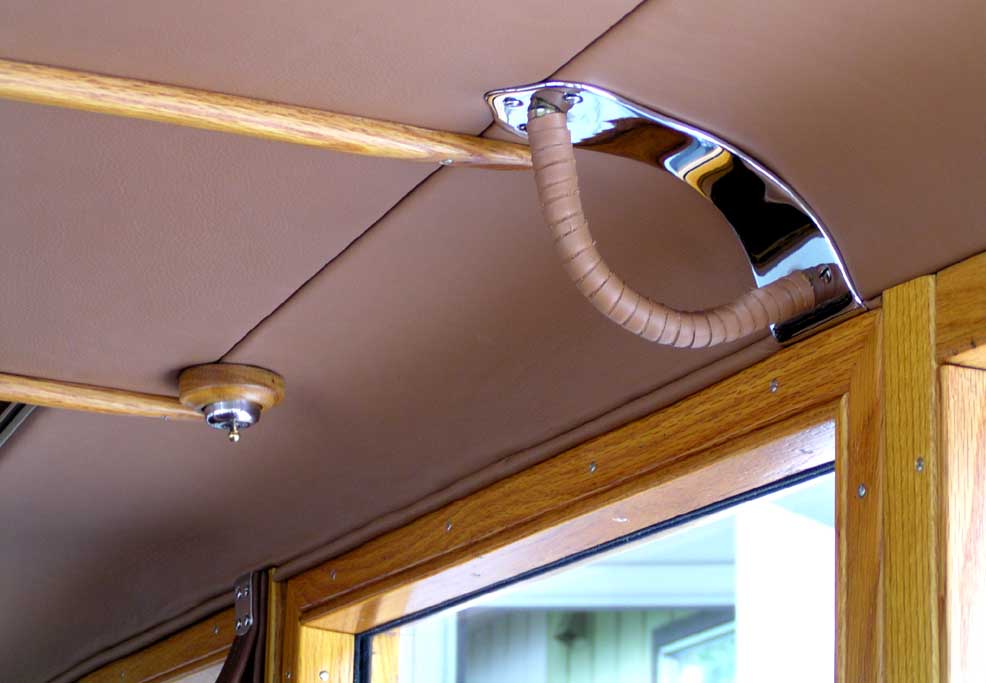
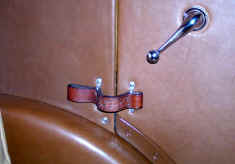
| The
rear seat grab |
| handle
with the leather |
| wrap. |
|
| Also
shown is the dome |
| light
switch. It is orig. |
| from
a 20 HP RR and |
| cost
$120 on E-bay. |
|
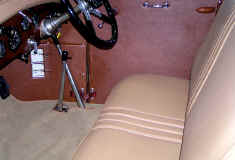 |
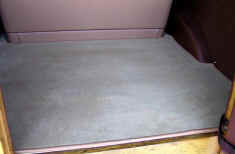
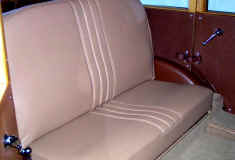
| The
front seat, hand |
| brake,
shifter, and |
| carpet
are shown here. |
|
 Return
to Main Page
Return
to Main Page